
This is a tutorial on how to model a real tread patter as opposed to just using textures to achieve the desired affect... so just click on the link to learn more
Step 1 Make primary tire profile. Surface>Revolve around Y axis, with 360 degrees, 8 sections, Surface degree of 3


Step 2 Make the inner tread curves that will serve as the tread’s floor. Make sure they go a little bit past the tire profile curves so we can later dived the tire surface. Revolve Curve


Step 3 Make a line going straight up from the center of the tire, make two copies of that line, Rotate one 0,-22.5,0 and the other 0,22.5,0. This will make a 45 degree section, Surface edit > Creatcurveonsurface> Project curve

Step 5 Trim all surfaces outside of that 45 degree section Surface Edit>Trim>Trims Surface, Click on all the sections outside of the 45 degree section and discard. Use the Surface edit> Create Curves on Surface> Intersect on the two tread surfaces, divide the main tire profile and trim away the excess skin

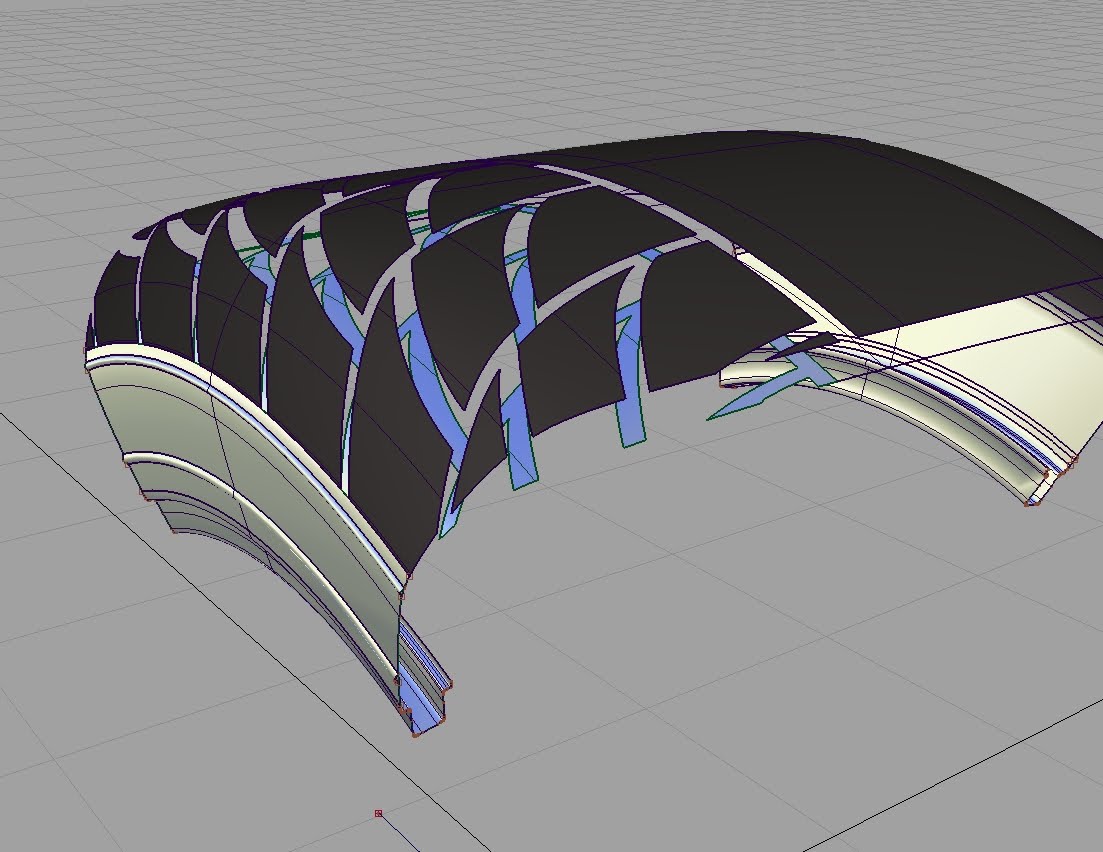
Step 6 Start developing tread shapes
Things to Consider
- Remember to place tread curves above the tire not on ground plane,
- Try simple pattern when starting just to get a feel of how it’s done.
- Treads usually have a two grooves in the middle to prevent hydroplaning
- Usually treads have one long groove going from the middle to the outside, to expel water, and a traction pattern between those two grooves.
- To develop the inside grooves you need to have the next repeat, so I got the initial groove curves, place its pivot point in 0,0,0 and went edit>duplicate>object see picture below


- The rule of multiplying the tread count is based on mathematics, since our 45 degree section is 1/8 of the wheel, than our multiples have to be by 8, if you want one tread per section than you want 8 multiples at 45 degrees, I want 5 treads per section so I need 40. So if you want your pattern to repeat 40 times, the degree change would be 9, since 40x9=360. If you want your patter repeat 80 times than the degree change would be 4.5


Steps 7 once you’ve developed your tread make sure its pivot is on the center line and scale it down to about halfway. Only the curves that are not repeated.

Step 8 skin all the curves to its smaller counter part

Step 9 duplicate the new skin, this time with enough duplication to cover your 45 degree segment, basically duplicate more than is needed and delete the surfaces that aren’t directly touching your tire. My case it was 4 with rotation 0,9,0 and 2 with rotation 0,-9,0

Step 10 Select all the new skins and go to front view. Use the old 45 degree lines to trim away all the skin we don’t need

Step 10 Select all the tread pattern surfaces and both the tire surfaces, then go to surface edit> Create Curves on surface> Intersect. Once everything is pink click on both the outer surface and the inner tire surface. This should put all the COS where they should be.

Step 11 Delete all the skins you have made, We only needed them to make the COS

Step 12 Go to the top view and project two straight curves for the inside grooves. Make sure they are surrounding the end of the curves
Step 12 Save before trimming because mistake will happen. In the top tire surface trim away all the grooves. In the bottom surface trim away the opposite trim pattern


Step 13 Start skinning the two tread patterns. Skin one of the treads in the middle so you can duplicate the surfaces.

Step 14 Duplicate the skins to cover all the treads. Trim and delete the skin you don’t need exactly how you did in step 10


Step 15, you can either repeat all the steps in the other side or slice it through the middle and mirror it like I did. I highly suggest you just mirror it. Edit>Duplicate>Mirror XY

Step 16, Nothing left to do but to Duplicate the tire around 7 times to complete the wheel. Edit>Duplicate>Object Number 7 Rotation 0,45,0
 My email is Raymundo302@gmail.com, if you have any comments or feedback just send me a message. Remember to check up on my blog as I will keep posting tutorials.
My email is Raymundo302@gmail.com, if you have any comments or feedback just send me a message. Remember to check up on my blog as I will keep posting tutorials.
your COS (Step 12) seem like they are closed at the side of the wheel and do exactly match on the edge of the inner wheel surface- unfortunatly mine are open right there
ReplyDeletethats great.....
ReplyDeletehttp://www.vjchougule.weebly.com